
Bluesky Personal Data Server
This is my first blog post. I bought this domain name to create a Bluesky Personal Data Server (PDS) so I thought it would be a good idea to start a blog on here as well. Makes sense my first blog post would be about how to install a PDS.
Bluesky is one of the few replacements for X/Twitter, along with Mastodon and Threads. One of the features of Bluesky is that it allows you to host what they call a Personal Data Server rather than relying on your personal data being stored in the Bluesky servers. This server contains all of your account information, and can be migrated from one server to another.
One neat benefit of hosting your own PDS is that you can have your own domain handle. For the majority of non-tech-savvy users, Bluesky handles are in the format of @username.bsky.social. If you own your domain and a PDS, you can have handles under your domain name, such as @parkerr.app—which is my handle—or @username.parkerr.app. I originally bought this domain specifically for this purpose and I’ll show you how I did it.
First, you obviously need your own domain. I’ve been using GoDaddy my whole life so I’ll continue to recommend them, however there’s plenty of registrars you can choose from and I have no strong opinions on that matter.
I decided to host this server on my own Raspberry Pi 4 and I thought this would be a good opportunity to use a Cloudflare tunnel, which allows you to tunnel your domain’s DNS traffic through Cloudflare and into your server. Think of this as a proxy that hides your machine’s public IP address from the domain’s DNS. When a DNS lookup is done for your domain, it would route to Cloudflare, which internally would route to your machine running the Clouldflare tunnel. The major benefit of using a Cloudflare tunnel is you don’t need to expose any ports on your machine.
Setting up the tunnel is fairly straightforward. When setting up your domain to use with Cloudflare, they will provide nameservers for you to use. Afterwards, all DNS settings for this domain you make should now be done through Cloudflare.
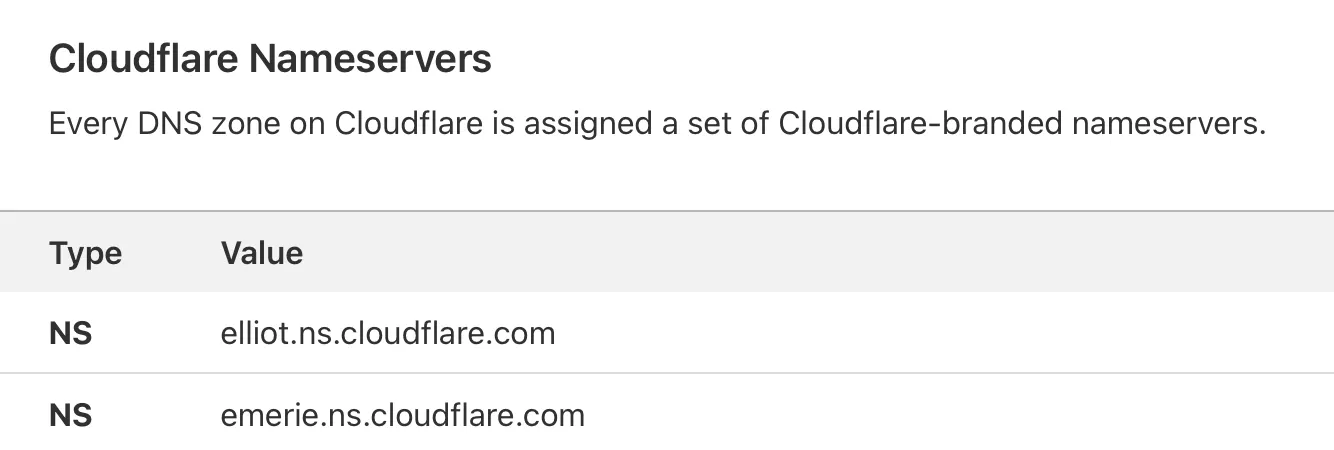
In GoDaddy, I assigned my domain these nameservers like so:
Next step is to set up the Cloudflare tunnel. To do so, go to the website dashboard in Cloudflare and click Access, and then Launch Zero Trust. Through here, you will set up the tunnel by going to Networks > Tunnels. Through here, I selected “Cloudflared” which is the software they provide for you to run on your server. After giving it a name, they’ll give you a few installation options, in which I decided to use Docker. Be sure to keep your token private. The command they provided was:
docker run cloudflare/cloudflared:latest tunnel --no-autoupdate run --token [REDACTED TOKEN]
Instead of using the docker run command, I created a docker network and moved this into a docker compose file.
docker network create cloudflared_network
docker-compose.yaml:
services: cloudflared: container_name: cloudflared image: cloudflare/cloudflared:latest restart: unless-stopped command: tunnel run environment: - TUNNEL_TOKEN=[REDACTED TOKEN] networks: - cloudflared_network
networks: cloudflared_network: external: trueInstalling the PDS was a bit of a mess. Bluesky offers a Docker image @bluesky-social/pds. Their docs suggest to download the install script it by running the command below:
wget https://raw.githubusercontent.com/bluesky-social/pds/main/installer.sh
This script creates a docker compose file and three services: caddy, the PDS, and watchtower. It also installs pdsadmin which is a CLI tool that interfaces with the PDS service, which runs in a caddy reverse proxy. I was getting consistent 400 and 500 errors when using the pdsadmin CLI tool. To get around this, I just set up my own nginx reverse proxy instead by adding the below to the docker-compose.yaml file we created earlier.
services: ... pds: container_name: pds image: ghcr.io/bluesky-social/pds:0.4 restart: unless-stopped volumes: - /pds:/pds env_file: - /pds/pds.env networks: - cloudflared_network depends_on: - cloudflared
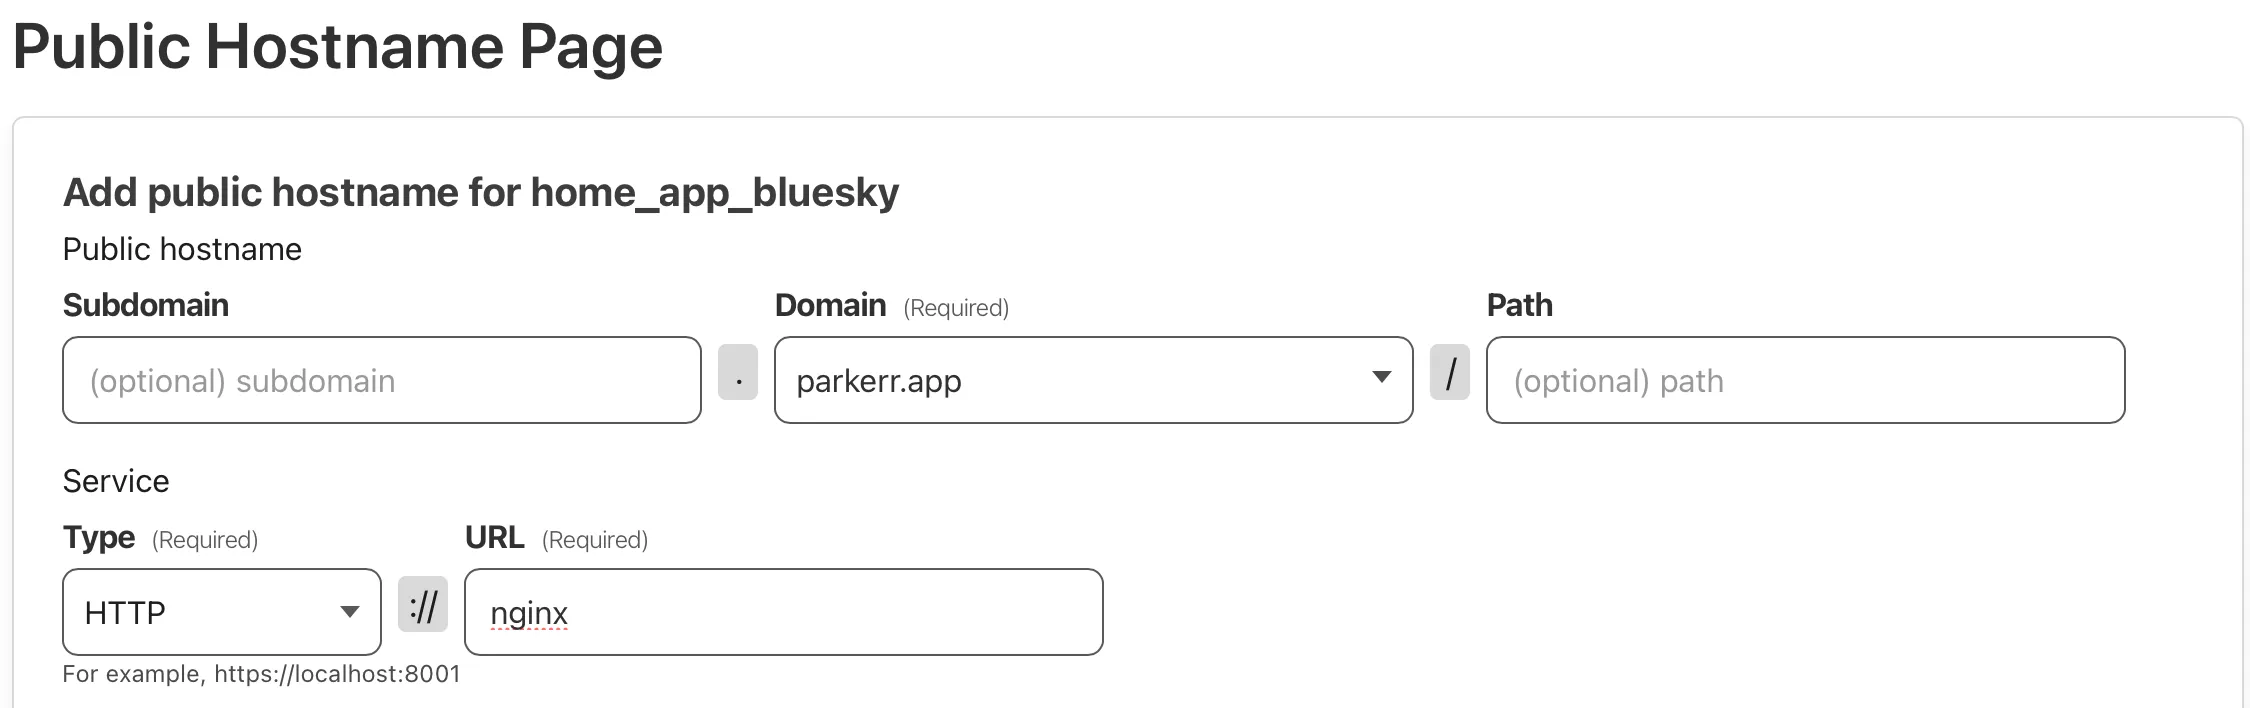
nginx: container_name: nginx image: nginx:stable-alpine3.20 volumes: - ./nginx:/etc/nginx/conf.d restart: unless-stopped networks: - cloudflared_network depends_on: - pds - cloudflaredIn Cloudflare Zero Trust, I added the hostname below:
By running sudo pdsadmin account create, you can create your account. Unfortunately, this command doesn’t support root domain handles, for example, I was not able to create @parkerr.app and instead had to create a dummy account such as @dummy.parkerr.app. We will fix this later.
sudo pdsadmin account createEnter an email address (e.g. [email protected]): [email protected]Enter a handle (e.g. alice.parkerr.app): dummy.parkerr.app
Account created successfully!-----------------------------Handle   : dummy.parkerr.appDID      : did:plc:22wqa4uibt4f7kguds6aycrpPassword : [REDACTED PASSWORD]-----------------------------Save this password, it will not be displayed again.
The DID is the account identifier for this new account. Keep note of this.
Next step is go to the Bluesky app, and sign in. For the hosting provider, because we are hosting the PDS ourselves, select Custom, and then enter the domain. In my case, it’s https://parkerr.app. Log in with the credentials provided by the sudo pdsadmin account create output.
The Bluesky app allows you to change your handle to anything that’s NOT root. For example, you can change your handle to @dummy2.parkerr.app. If you want to change it to @parkerr.app, you need to prove you own this domain.
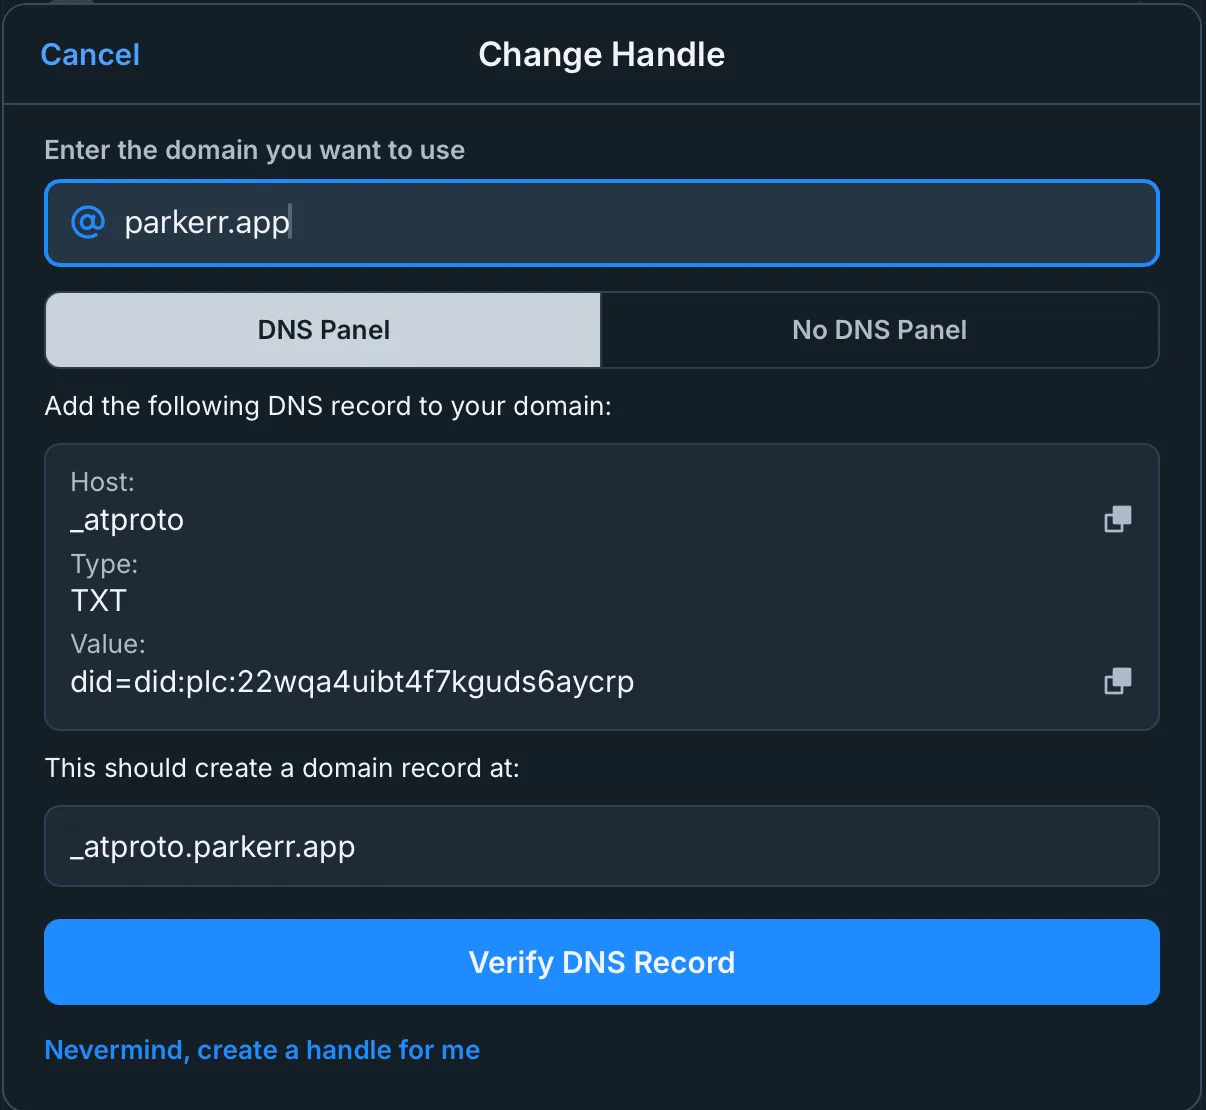
The instructions there are clear enough. In Cloudflare, I added the below DNS record:
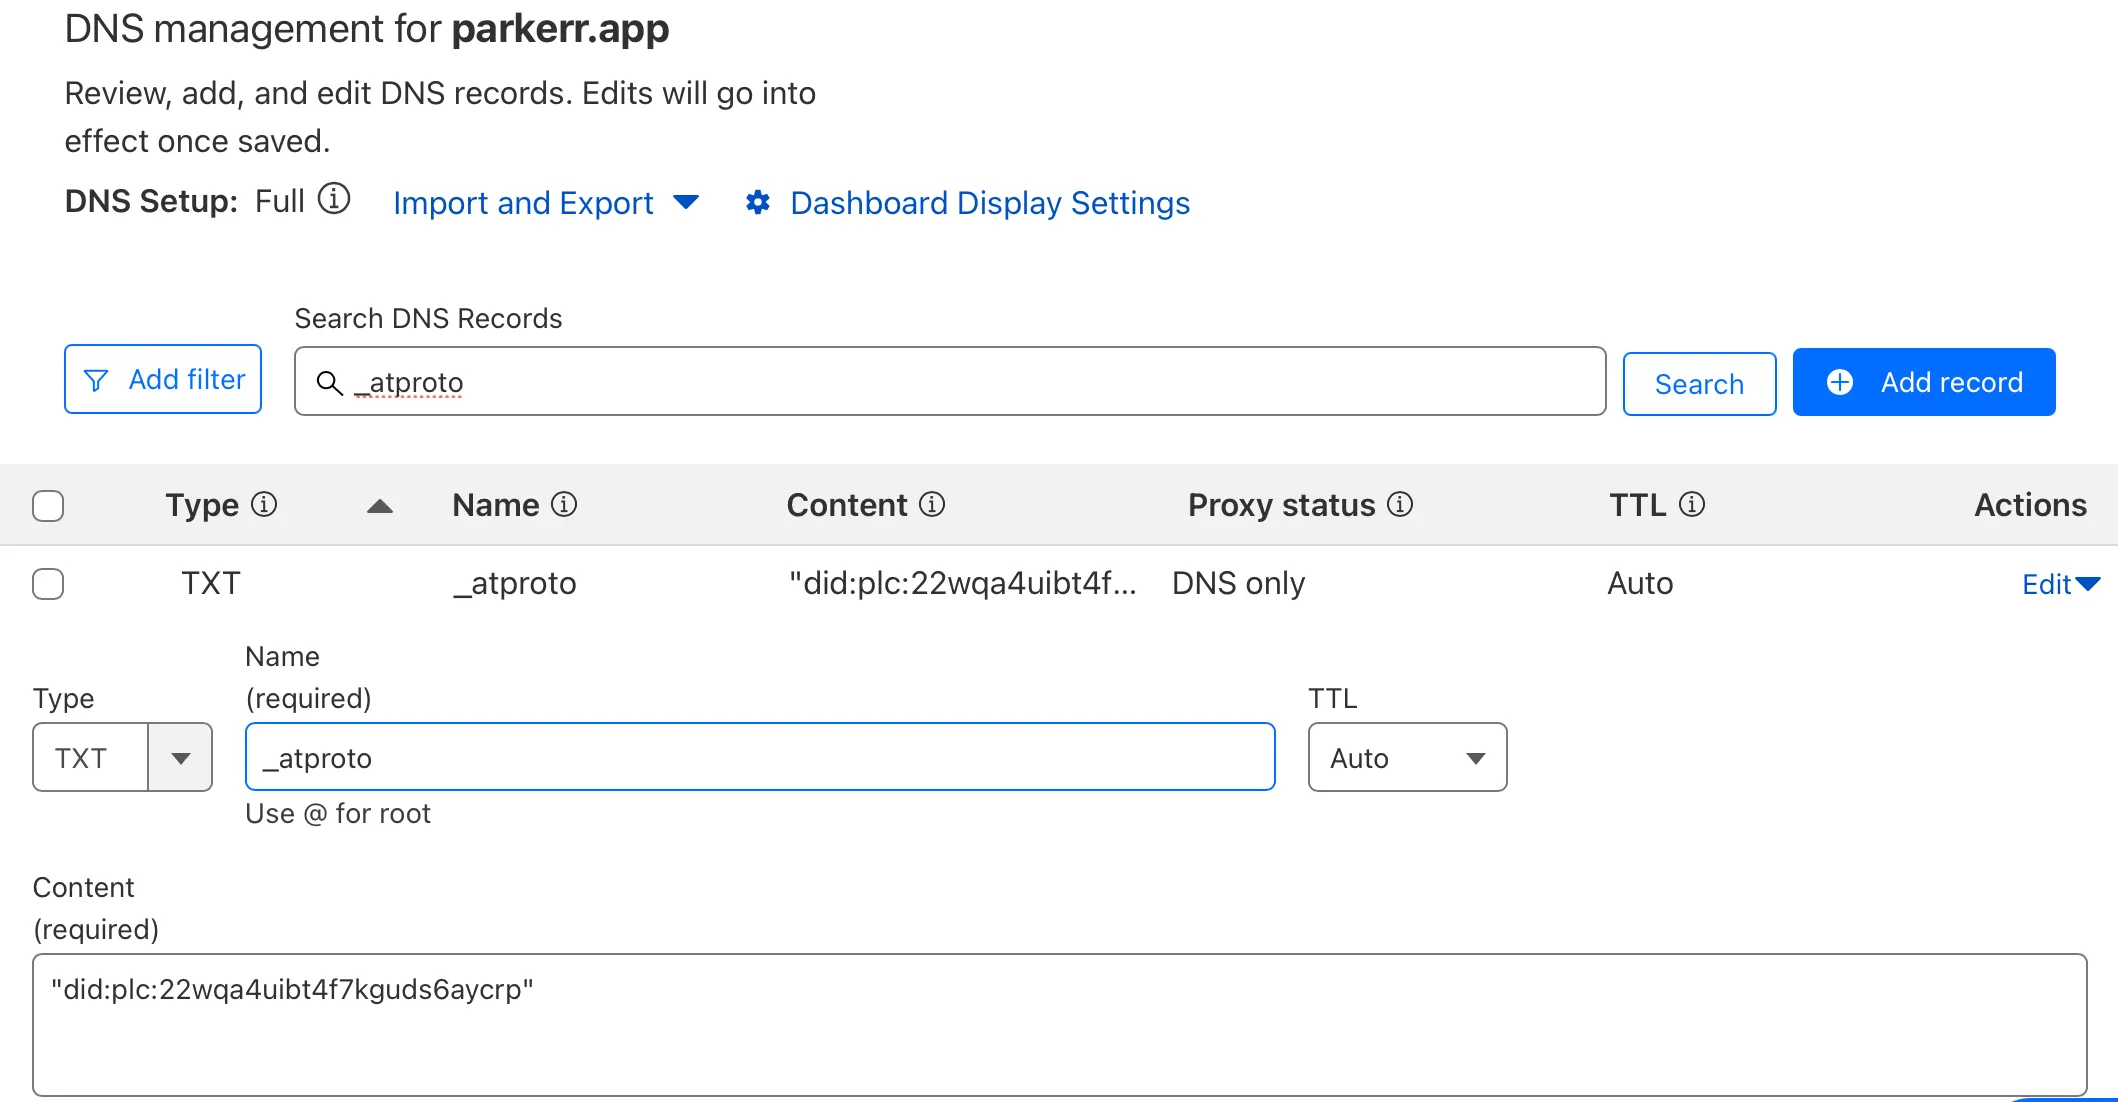
After clicking Verify DNS Record on Bluesky, your handle should change. Well, it should, but it won’t, because there is a bug in the Bluesky UI. They offer another option to verify your domain by adding an entry into /.well-known/atproto-did.
Below is my nginx/default.conf file. I didn’t want to actually create this /.well-known/atproto-did file, so instead I simply return the DID string through nginx.
default.conf:
map $http_upgrade $connection_upgrade { default upgrade; '' close;}server { listen 80; server_name parkerr.app www.parkerr.app;
location /xrpc { proxy_pass http://pds:3000; proxy_set_header X-Forwarded-Proto https; proxy_set_header Host $host; proxy_set_header Upgrade $http_upgrade; proxy_set_header Connection $connection_upgrade; }
location /.well-known/atproto-did { add_header Content-Type text/plain; return 200 "did:plc:22wqa4uibt4f7kguds6aycrp"; }}We are very close to done. Last step is to now actually change our handle from @dummy.parkerr.app to @parkerr.app. Instead of using their UI to change the handle, I found a solution on GitHub. You can find your admin password in /pds/pds.env.
curl --request POST -k \ --url "https://parkerr.app/xrpc/com.atproto.admin.updateAccountHandle" \ --header "Content-Type: application/json" \ --user "admin:[REDACTIED ADMIN PASSWORD]" \ --data '{ "did": "did:plc:22wqa4uibt4f7kguds6aycrp", "handle": "parkerr.app" }'If you want the ability to send verification emails, I used Resend. After configuring the required DNS entries, add your API key to the /pds/pds.env file.
Voila. Feel free to follow me on Bluesky!